Events
A registration-to-check-in checklist for event teams
Follow a fictional 80-person gathering from its registration form to the welcome desk, with clear decisions for every handoff.

Registration and check-in are parts of one welcome. The details collected before the event should help the team recognize participants and give them a clear next step when they arrive.
Start with the arrival process, then work backward to the form. If a field does not serve a defined purpose, question whether you need it. The example in this guide is a fictional 80-person gathering with free general admission and a separate volunteer registration option.
Decide what the welcome desk needs
Write down how a participant will identify their registration, who can resolve a missing or duplicate entry, and what happens after check-in. Keep the routine path short. Give exceptions an owner so one unusual case does not leave the rest of the welcome team guessing.
For our example, the welcome lead reviews the registration list, two volunteers handle arrivals, and one organizer handles exceptions. They agree which entrance to use and what instructions a participant receives after being checked in.
This is a staffing example, not a recommended attendee-to-staff ratio. Your venue layout, arrival pattern, accessibility needs, and registration process should shape the actual arrangement.
Review the registration form before sharing it
Make ticket choices understandable. “General admission” and “Volunteer registration” should describe the intended choice without making participants decode internal labels. Explain any important difference near the choice.
Every input needs a meaningful label. The W3C form-label tutorial explains how labels identify controls and how they should be associated with their fields. Review the form with a keyboard as well as a pointer, and check that required fields and validation messages are understandable.
For the fictional free event, test one general registration and one volunteer registration in an appropriate test environment. Confirm the intended confirmation and arrival instructions. Do not create charges or register real people merely to test a marketing example.
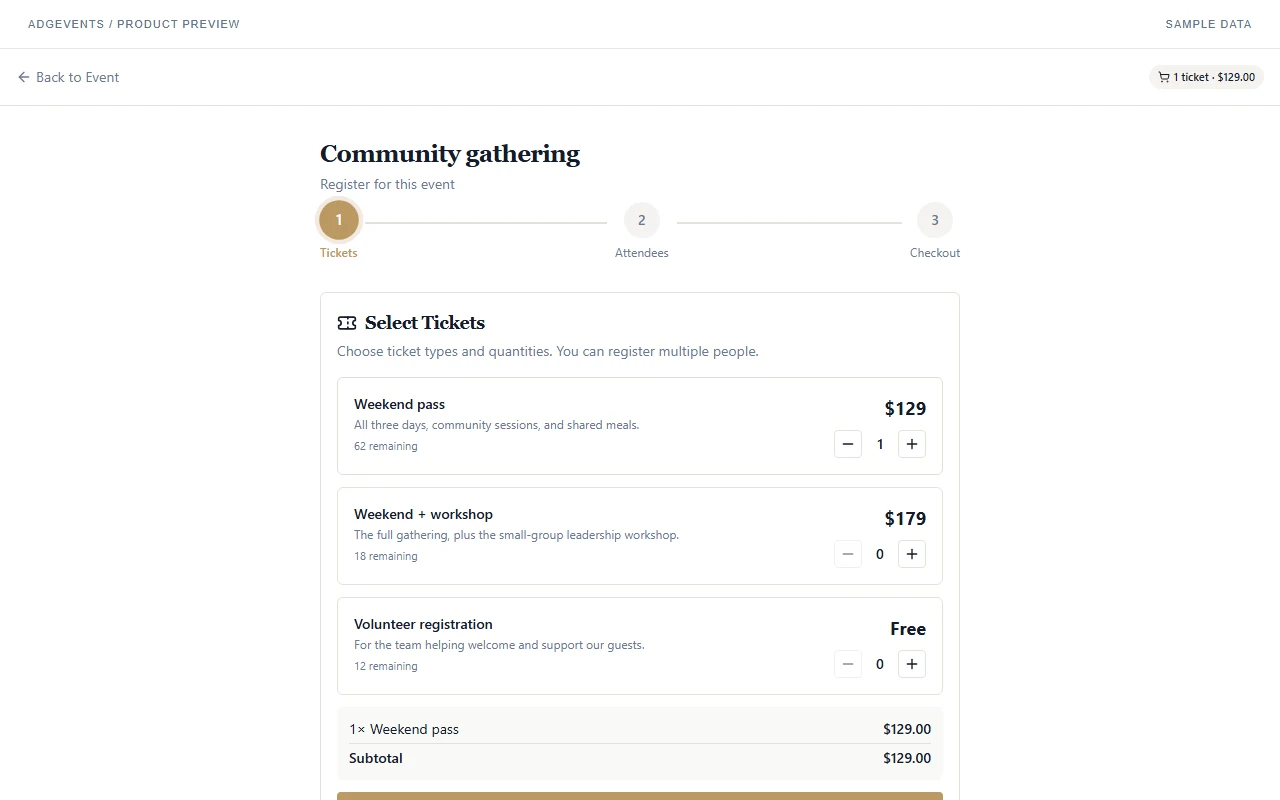
This is the actual registration interface with sample data. ADGEvents supports event registration and QR check-in. Paid ticket checkout requires your organization’s approved live Stripe Connect account; the existence of a registration page alone does not mean paid checkout is ready.
Follow the handoffs
| Stage | Owner | Check | What moves to the next stage |
|---|---|---|---|
| Before opening registration | Event organizer | Ticket choices and form reviewed | Approved public registration link |
| During registration | Registration lead | Participant questions assigned | Current registration records |
| Before event day | Welcome lead | Arrival process and exceptions agreed | Team briefing and access |
| At arrival | Check-in team | Identify the correct registration | Participant directed to next step |
| After the gathering | Event organizer | Outstanding issues reviewed | Follow-up responsibilities |
Avoid parallel “official” lists. If someone exports a roster for an operational need, identify when it was created and how later registrations or corrections will be reconciled. A download does not automatically contain subsequent changes.
Rehearse three exception cases
First, consider a participant who cannot find their confirmation. Decide how the authorized team will find the correct record and verify the match. Second, consider a name that appears more than once. Decide who resolves it rather than guessing which entry is right. Third, consider someone at the wrong entrance. Make the onward instruction clear and welcoming.
Keep personal details out of public displays and broadly shared team messages. Share the information needed for the task through the access controls appropriate to your organization.
Copy the arrival-readiness checklist
- Ticket names explain the available choices.
- Form fields have meaningful labels and understandable validation.
- Confirmation and arrival instructions have been reviewed.
- A sample registration has been checked through the intended process.
- Paid ticket requirements have been verified if the event charges admission.
- The team has appropriate access to current registration records.
- Missing, duplicate, and changed records have an escalation owner.
- Printed or downloaded rosters have a clear version and reconciliation process.
- Check-in equipment and the venue connection have been tested.
- Participants receive a clear next step after arrival.
Download the registration-to-check-in worksheet. Continue with the run-of-show guide, or explore the event management product page to see the related workflows.